Cities
Cities are used to defined the location of projects. A city can be a municipality, a region, or a state. This allows you to give access to a user for a specific location. For instance, you can give a user access to the WSC-Index tool for the City of Melbourne but not for the City of Sydney.
Cities can be organized into groups to simplify the process of granting access. For example, the WSCU has a group for WSC-Index cities, which contains all the cities that have been assessed using the WSC-Index tool.
Cities are mainly used in the WSC-Index tool but can also be used in other tools in the future.
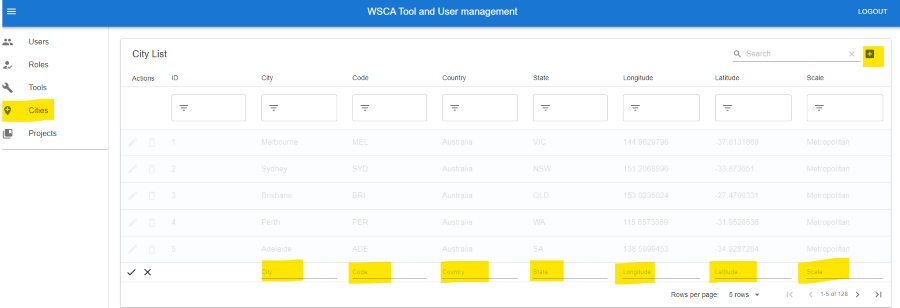
Create a New City
Click on the “Cities” tab
Click on the “Add” button in the top right corner.
Fill in the required fields
Click on the “tick” button to create the city.
Note that the city code is used to identify the city in the WSC-Index tool and should be unique. Scale is typically Metropolitan or City Council.
Edit a City
To edit a city, click on the “Cities” tab and then click on the “Edit” button next to the city you want to edit. Make the required changes and click on the “tick” button to save the changes.
Delete a City
To delete a city, click on the “Cities” tab and then click on the “Delete” button next to the city you want to delete. Click on the “tick” button to confirm the deletion. Note that deleting a city will also delete all projects that are associated with it.
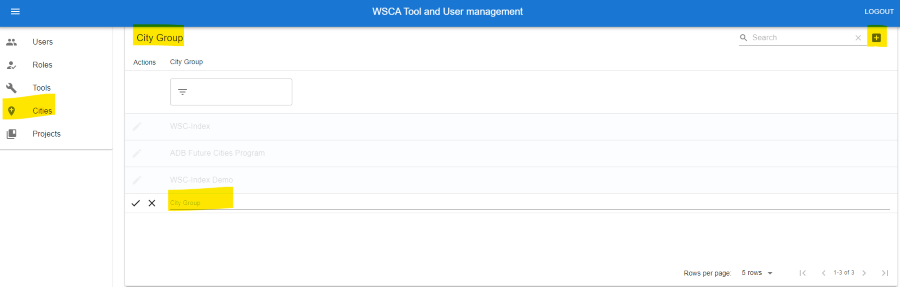
Create a City Group
Click on the “Cities” tab
Scroll to the “City Group “section
Click on the “Add” button in the top right corner
Fill in the required fields and click on the “tick” button to create the city group.
Note that the city group name should be unique.
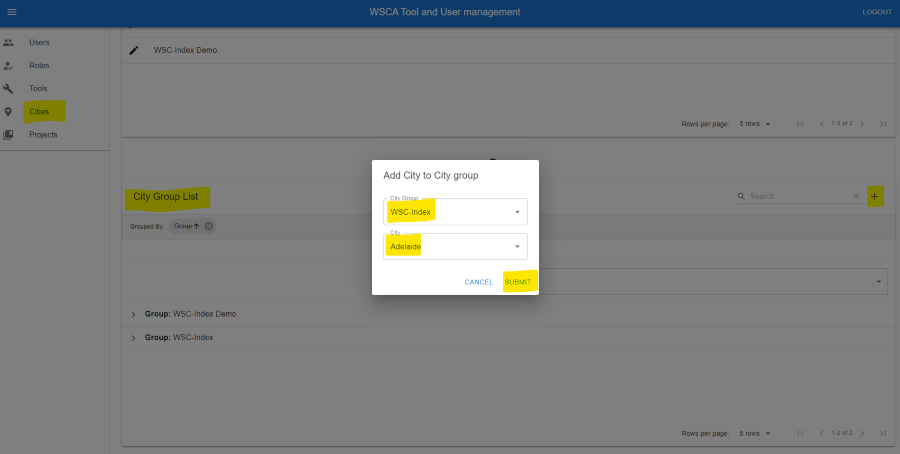
Add Cities to a City Group
Click on the “Cities” tab
Scroll to the “City Group List”
Click on the “Add” button in the top right corner
In the popup, select the cities you want to add to the city group and click on the “Submit” button to save the changes.